Thursday, 9 May 2019

1875 Black Victorian Corset

Isn't she gorgeous?? I can't get over how beautiful the corsets of the mid-late Victorian era are. They have such amazing flossing, laces and trim. The craftsmanship of the stitching, albeit with machines at this stage, just delights me. And as usual, this admiration creates a desire to own a pair myself, and the experience the ins and outs of the actual making of one.

This was my inspiration:
1875 Symington corset in lasting, cotton and hessian
It has created such a beautiful geometric lattice of stitches, which is just lovely and takes a plain black fabric to a work of art.

I took the pattern for the Khaki Corded Corset from the Jill Salen book "Corsets", which is actually dated 1890-1900. However she herself says this corset is very similar to the above corset, and there is very little difference in the styling besides the hip gussets that I can see. It's like a combination/hybrid of the Khaki Corded and the Pretty Housemaid!

The stack of imported coutil was sitting there, calling, so this project was going to use a beautiful rich black brocade with gold spots bought from Vena Cava, UK. As I wanted the gold spots to feature, I used black thread to sew this up, rather than the gold/yellow thread featured above.  I started looking into which busks/eyelets etc I would need, and quickly realised that the only option was to Go Gold. I wanted a straight busk like the above, rather than a spoon busk, which fortunately came in gold, so ordered this, gold grommets, some steel boning and black lacing from Sew Curvy, UK

Cue impatient waiting.

In the meantime I could scan and print off the pattern from "Corsets". I am still struggling with figuring out easy ways to stretch patterns width and length ways to fit my sizing requirements, but in the meantime the old cut-and-stick works for adjusting sizing. 

Well, I thought it worked, but in the end my sizing was way off and I had to adjust seam allowances to accommodate. One day I'll figure it out. 

The pattern called for four bust gussets and four hip gussets, all fully corded. This was somewhat of a challenge as it takes a bit of guess work to account for shrinkage: I like to use the method of sewing the cording into the fabric, keeping the back fabric tight to ensure the bumps are on the outside for maximum visual impact. This work absolutely killed my neck and shoulders as it involved so many hours of closely watching stitches on the machine. An hour a night was all I could stand before the heat pack came out and that was me for the evening. 

Finally I was challenged to decide on flossing designs and so I used a gold top-stitching thread for great visibility, and a rather open design rather than a satin embroidery finish. I'm happy with it, though it certainly improved as I got further into the project. 

It was finished with a gold braid along the top and some black lace. The fit is great, and it looks and feels amazing. I do have wrinkling issues at the waist, and I know how I can improve that next time, but for now it is a great corset that will cover 1875-1900 quite happily. The measurements were about 34-25-35, none of which are my actual measurements but the style allowed me to add to bust and hip and take away from waist pretty easily. I'm looking forward to trying out some other of the Symington collection corsets over the next few years!


I am wearing an early Victorian chemise of lawn

(sorry about the blurriness) It laced up perfectly

The fit was very comfortable and supportive

Fitting the corded hip panels was rather tricky! 

Detail of the top edge

Shadbelly - what?

My 18-year old daughter has competed at dressage for years, and she asked me if I could make her a shadbelly. A what? you may ask. This is a dressage coat for those riders at higher levels. It has tails, it is double-breasted, with 'waistcoat' points, and it's based on the day coat worn by those super trendy men in the early-mid Victorian years.

My research brought up only one company selling ready-made patterns of these coats, Suitability, based in the US. I ordered this dressage and shad belly pattern and started my research into how to actually tailor.

As all I'd ever done was dressmaking, I thought the first step was an online course, so I purchased this jacket fitting course off Craftsy, which was fantastic. I know how to make toiles from my years of trial and error, but this course gave me some tried and true practices when fitting a toile, as well as confirmed some of the ways I'd figured out how to do things. The fitting process was ssslllllooooww as for some reason despite my commitment to making the jacket, my daughter never seemed to be around (or willing!) to stand for a fitting. It was very interesting adjusting the fit for her actually. I learned that she and I might look like clones, but our body shapes are entirely different. While I have to account for wide, straight shoulders for me, she has very sloping shoulders. While I add 1-2" to my length, hers needed reducing by 1". While my sleeve length never changes from the packet, hers needed cuffing at the maximum length possible. And yet we are the same height and wear the same size clothing. It teaches me how crucial toiles are for well-fitting tailored clothing.

Finally happy with the finished fit, I purchased another course, this time on modern jacket sewing techniques and took a trip to the fabric store. My daughter wanted to stray from the traditional colours of navy and yellow, and instead chose a colour scheme of grey and pink, which is a beautiful combination! The first fabric I chose was 100% wool, but I changed that to a wool/poly blend, as it is going to be getting lots of wear and tear in it's life, as well as downpours and horse-slobber, so I wanted something pretty hard-wearing. I lined it with a satin lining as the regular lining was just a bit too transparent. I was completely unfamiliar with the correct weights of fusible interfacing for jackets, but what I've used seems to work. I've decided I definitely need a new iron and ironing board. Suggestions welcome!

I'm pretty happy with the finished result. Yes, I did make one or two mistakes, and there are a few things I would do differently next time. Next time? When my daughter is riding Grand Prix, that is. The pattern was...ok, but not perfect. It seems to have completely omitted a couple of steps despite me reading, re-reading, re-re-reading to find it (how to complete the front and front facing waistline?), and I was definitely not happy with my working of the piped front - not one of my finest hours. However, it fits like a glove, it has all 20 buttons attached and all 14 button holes in working order, and most importantly, my daughter is happy with it. Tick.

Finished jacket

Finished jacket - tails

The tails are tacked open to sit properly when mounted

Yes, I should have tidied up the button holds - doh.

Points are in dusky pink silk dupion - scraps worth keeping!

I'm about 50% happy with piping. Next time...

The fit is suited for riding, but I'd consider subtle
padding next time, to fill the gap between bust
and shoulder.

I loved the seam lines. 
The first time using shoulder pads!
I can't wait to see it in a dressage test now!

Sunday, 10 March 2019

February Challenge: Linen/linens

Well, hello! My favourite fabric, especially when it's a lovely, hot summer!

Our beautiful botanic gardens here in Wellington, NZ turned 150 this February, and we celebrated with a Victoria picnic. Friends were happy to join me in costume at the event...and as usual, I had nothing to wear. I actually literally mean Nothing To Wear, as I have no Victorian clothing at all, beyond the chemise and corset I made last year - yet to blog about.

Sunday, 30 December 2018

December 2018 - the final challenges

Despite not being actually on holiday, I fell into the spirit of things and started a list of 'Things To Complete Before the End of the Year'. This can either go one of two ways: it can motivate me, or, which is far more likely, it can completely terrify me and after throwing myself into a complete spin of indecision and confusion, I get absolutely nothing done.

Wednesday, 14 November 2018

A White Regency Evening Gown

This gown has been a long time made now! I purchased the fabric while on holiday with my family nearly 2 years ago now, sewed it during the following year, and I have finally had the opportunity to  wear and photograph it! Last month we had our first Historical Weekend in a beautiful cottage on lovely grounds up the coast. Our Sunday meal was designated as a Regency Tea, which was incredibly fun! Not only did we all have gowns to wear that suited the era, our amazing Nina and Leimomi organised some gorgeous dishes for the meal in keeping with the style...who knew cucumber could be dressed so many ways?! I will be including some more photos from the weekend in future posts, assuming I manage to get some kind of organisation in my life! But for now, I'll feature the regency gown.

Sunday, 12 August 2018

4 Day Pirate Costume

Everyone loves a challenge...right?

Our newly formed/re-formed Historical Sewing group organiser Leimomi, invited us to a Pirate Picnic...with four days notice. Bless.

Friday, 20 April 2018

A Regency Petticoat

Satire of regency women's fashion
The regency love of all things classical wasn't always suited to life in Britain. Ancient Greece maybe. Even 'current' day Italy. But thing were a little cooler, damper and less comfortable in England for the ideal image of the casually draped whispy sheet over the girlishly youthful figure that society sought to emulate.

Saturday, 17 February 2018

Regency Shift

As you have seen in a previous post, I made a set of Short Stays for the new era I am focusing on: the Regency era. FYI, this was officially the years of 1811-1820 in England, while under the rule of the Prince Regent George IV, but the style of clothing started a few years earlier. The style was very skimpy, flimsy and whimsical, showing plenty of arm and bosom during the evening. I needed a new shift that wouldn't show under my new gown!

Thursday, 15 February 2018

The Year of the Needle

As I enthusiastically and optimistically stated in my previous blog, this is my year for sewing. In a kind of half and half way. My slightly OCD mind loves order and plans...lists of lists, anyone?
So I looove joining in with The Dreamstress's Historical Sew Monthly challenges. Here are the challenges I will participate in:

Thursday, 8 February 2018

Finding self expression when in life-survival mode!


Finally a cup of tea! (Namibia)
It's the beginning of 2018! The beginning of the year is always a good time to reasses your life and in what direction the currents of influence in your life have turned you.
Have you met new people who have swayed your interest towards activities you previously weren't aware of? Or maybe you have been dreaming for years of a particular hobby that you never thought you'd bring into reality in your life, and your life situation has changed to allow your to have time to pursue these? Or even your work position has changed one way or another and you have more or even less time for yourself?

Thursday, 6 July 2017

Regency Short Stays

It's time to make some short stays! As I discussed in my last post, I decided to start by making some short stays from the Regency Underthings pattern by Sense and Sensibility.
The pattern was pretty straight forward and most importantly, I could download it, print it out and start making it instantly! I tend to be impatient like that, not exactly compatible with historical sewing, I've discovered. None the less, I managed to work out how to print to scale and dived straight in.

Monday, 26 June 2017

Tiptoeing into Regency

Mr Darcy and Elisabeth Bennet from Pride and Prejudice

Ah yes, that familiar sullen look paired with the cherubic smile in Pride and Predudice. It's probably the first era that comes to mind when I think about costume dramas. I watched the six-part series when I was about 16, and there will never be another Mrs Bennet or Mr Colins for me.

I was feeling quite content with my progress through the 18th century. Sure, it needed quite a bit more tweaking and I'm sure would horrify those truly Historically Accurate seamstresses out there. But for me, I had a fairly good grasp of the development of the main fashions from the 1720s though to 1785. Now it was time for a new era.

Wednesday, 14 June 2017

Silk Taffeta Petticoat (and jacket shhh)

Fabrics...?

Fabrics are another unknown piece of the puzzle. I knew the main differences between polyester and natural fibres, and that some are blends of the two. I didn't know much about what fabric were used for which by which class and so on. As was evident from the fact I made a robe a l'anglaise from linen. (The petticoat at least is Historically Accurate as linen petticoats are common)

I'm sure the women at my favourite fabric store (The Fabric Store, oddly enough) must have thought me very strange, moving back and forwards through their little shop and fingering dozens and dozens of different fabrics. It gave me quite a good idea of what kind of fabric actually feels like, and drapes like. In the process, I decided that silk is a ridiculous option for 18th century clothing, being so drapey and fine, and that silk taffeta is gorgeous and much better for the job. Since then, I have learned more about the different qualities of silk that were available: 17th-early 18th century silks were much thicker and stiffer, like our upholstery-quality silks (note that for the next time I visit my favourite upholstery fabric store - I know they have some silk curtain fabric at $50/m...) and that later in the 18th century, more like the 1870s, the silk became finer and more like the tissue-thin quality we find today. Also, I had not come across the fact that interlining is my friend, which of course changes the way that silk acts.

I have always loved stripes. Especially 3cm stripes. I found a short piece of a red self-stripe (if that's what its' called...must research that too...) in a floaty silk and decided it would make a perfect little jacket. I just pictured a vibrant red petticoat to go with it, and a silk-taffeta would be just the thing. 3m of this, a little red linen for lining and I was off home to find a pattern...

I decided to use the same little 1770s jacket pattern I had used in the past by JP Ryan (see my pattern review page). Probably a mistake as I hadn't been all that happy with the last one. In fact, this is probably the worst mistake a sewer can make: repeat the same mistakes instead of learning from them! The jacket is made up with modern bag-lining technique (another term I have to research to make sure I'm using correctly). The sleeves were sideways as I had matched seams instead of notches, nothing sat straight, and it was next to impossible to get on without getting a cramp in my neck. This, I found, is a common injury for getting into costume unaided!

I pulled out the sleeves, reset them, and it still doesn't fit properly. I'm embarrassed to even include the photo, but I guess that's what this blog it about...the process. So there's one or two below just to chuckle at. The whole thing was hand-sewn for some stupid reason, using a gorgeous red silk thread. What a waste of time...

As for the petticoat, what a joy. No pattern of course - I just do the same (18th c?) knife/box pleat combo each time. One thing I do need to figure out is the tying strategies. I do the whole tie-the-front-round-the-back-and-the-back-round-the-front thing. But I have 2 questions: How do you get it to stay tight when you're doing it yourself, and What do you do about the knot bulges? Put that onto the research list...

For some reason I had a picture of a wide flounce around the bottom of the petticoat. I used every single mm of fabric, figured out how much I actually needed to go around the circumference (don't ask me how I worked it out) and came up with a width that would use up the remaining fabric. Or maybe I worked out the width to cut it out, and then figured out what size box pleats I could make using that length of fabric... Nobody understands the mind of a historical sewer...I thought box-pleats seemed to be the thing to do (again, don't ask me why) and that a little flounce at the top would be about right. I hand sewed the whole thing, including the side seams, as it was so nice to use. The flounce was pinked top and bottom - first time pinking, and I'm sure it's addictive!

And finally I decided it was much too long and that pin tucks would be just the thing, so did three of these, also by hand. I just adore them, they are so sweet.

Below are the photos of the finished result. I'll slot the jacket photo in between in the hopes that no-one notices it.


Red silk taffeta petticoat

jacket

Flounce and pin tuck detail
 Just for interest's sake:

  • Jacket silk 50cm $15
  • Petticoat silk taffeta 3m $60
  • Red linen 50cm $10
  • Red silk thread $7
  • TOTAL $92


Future notes: 

  • Rip apart the jacket.
  • Learn how to mock up this jacket pattern properly, and how to set sleeves traditionally.
  • Interline the silk.
  • Just one or two minor points to learn from...


Saturday, 10 June 2017

Silk 18th Century Petticoat in Blush

My holiday morning coffee
This is how I like to holiday. It's camping...of a sort.

Queen sized bed on it's own folding base, side table, duvet and pillows. Gosh, even my favourite linen bolster pillow! Coffee, a good lantern and some books. You can't see the shag-pile rug or the gold LED light hanging above the bed.

I admit, we do take rather a lot camping. It's my husband's fault. He insists we take our horse float. It means that nothing needs to be tied down or water-proofed. You just chuck it in and shut the ramp. I've built a shelf that fits at the mid-height, leaving us twice as much storage area. Bikes and surfboards under, suitcases and bedding on top. The rug went in to protect a surfboard, and the rest...well, there was room...so why not?

Well, camping is all fun and games for the kids, but sometimes it gets a little boring for me. I had brought along with me a couple of big hard-backs of garments from the Met. Museum - just your average holiday reading. I was reading up on 18th century clothing and underwear. But the natural outcome was the desire to start creating. So I went in search of a fabric store.

In fact, there was a fabric store and I was able to purchase a couple of fabrics, a sprigged cotton which I intended to use on a Regency dress at some time, and a blush silk. Sure, it was only dupioni silk, but for all that purists say it's sub-standard and barely fit for lining, I like it. I love it's slubbiness and it's lustre. I'll say it's an under-petticoat, and just enjoy the fact I'm wearing a silk petticoat, should that ever actually happen. Highly unlikely. For now, it's an 18th century silk petticoat that just sits in my cupboard and looks pretty. :-)

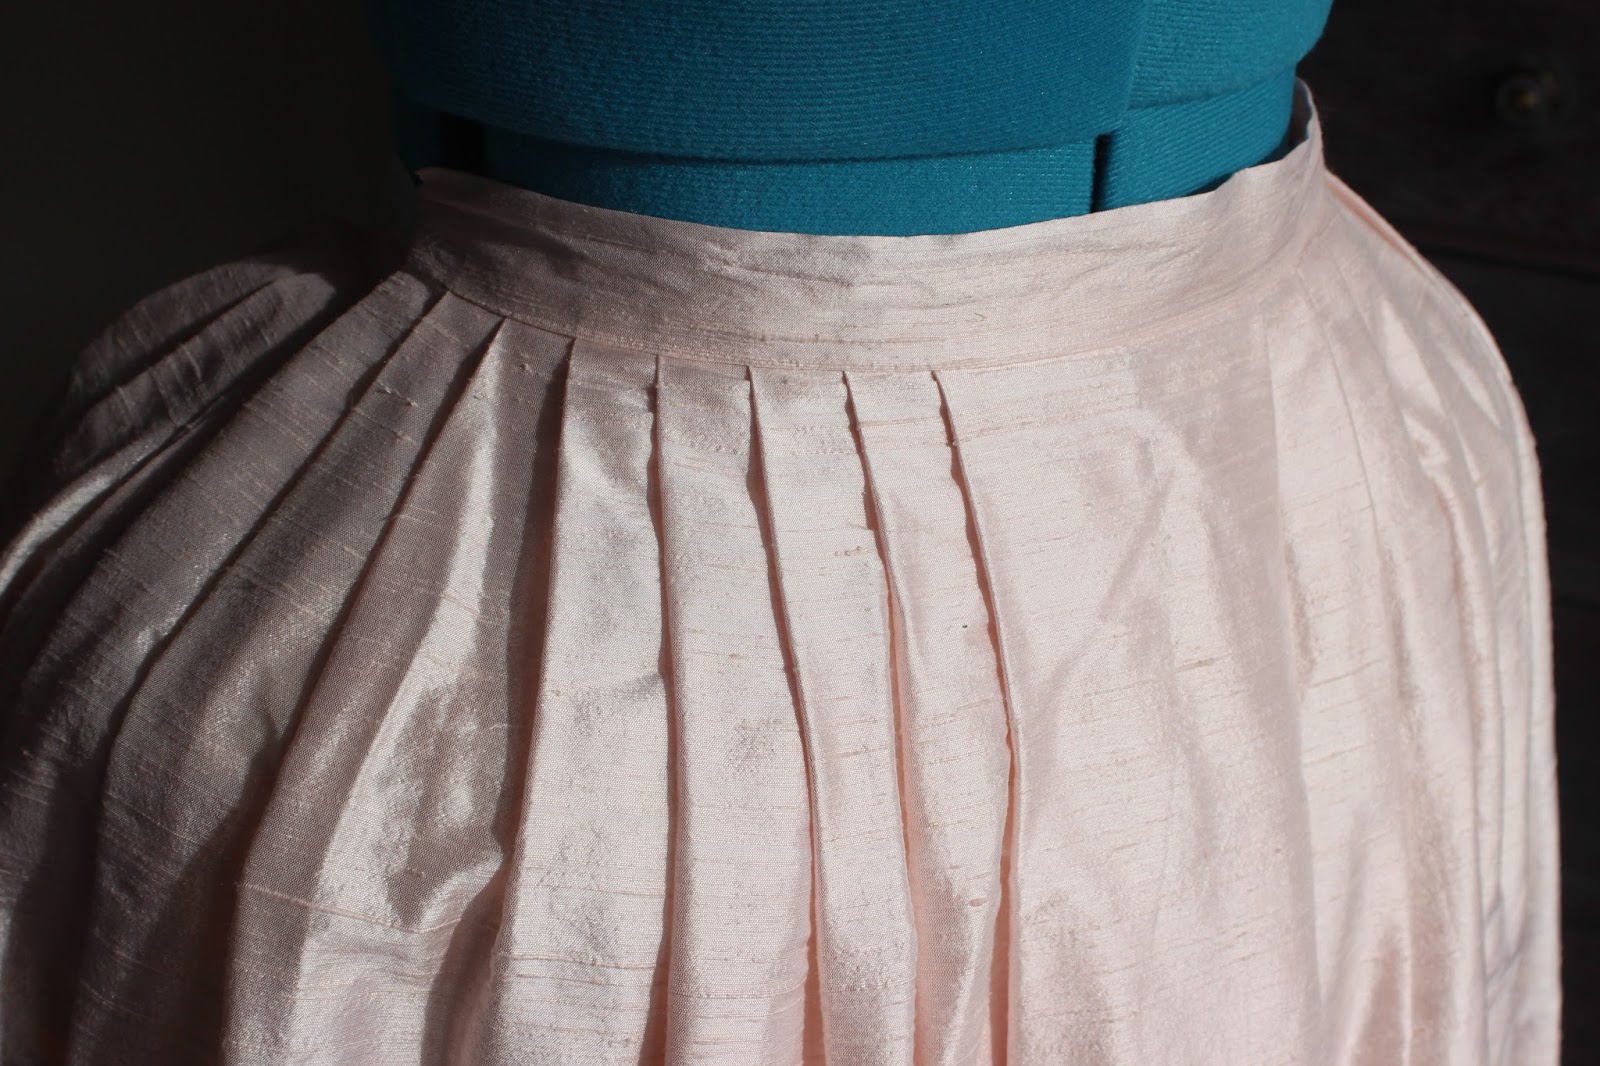
First, stitch up side selvage seams, then stitch (running) 10" pocket openings.

Pin up 1" knife pleats with large box pleat at centre front
and inverted box at centre back.

Cut waistband from self-fabric and pleat to match width, leaving SA at edge

Sew waistband to pleats using backstitch

Outside of waistband before whipped to inside


Finished waistband on petticoat

Bottom hemmed, tucks added by hand, and lace edging

Yep, the lace is probably terrible. I'll have to have a look further into that: lace is certainly something we 21st century women know nothing about! My daughter (16) doesn't even know what it is. For now, it's staying. When it has an actual costume to compliment, I will find out what kind of lace is appropriate and I think it will require a whole post. 

Thursday, 8 June 2017

Grey Linen Full-Boned Stays

There is one fundamental problem with period correct back-lacing stays: Ones inability to get in or out of them. Have any of you felt that panic well up inside you when you realise you are STUCK? (I'm brought to mind of an experience of my brother who had to get a friend to cut him out of a wetsuit once!) It's not a pleasant experience.

Monday, 5 June 2017

Chill Up My Spine over an 8-year old post

Now that was weird.

I'm trying to connect with other historical sewers in my area, and have spent some time looking through The Dreamstress' website. She lives in my area of Wellington and so far I have not been able to get in contact with her - there doesn't seem to be many in our little New Zealand, so I have discovered!

Do you see anything familiar about the below two links??

This one by The Dreamstress

and this one? my first post I think (scroll to near the bottom)

Yes, my husband and I featured in her blog nearly 10 years ago, LONG before I even considered actually sewing a dress like it. We are also in the third picture as well - I can easily spot my husband with his overgrown red curls and gold coat!

I certainly hope that we are considered "Gorgeous, inspiration-worthy rental costumes" rather than the ones she had to "refrain from being a costume snark"! I know we were certainly "awkward and self-conscious of how to act"! Yep, Leimomi has a very good understanding of how it is for us debutants.

It certainly gives one a funny feeling when you open a page and there you are!

What a lot of lace!

A Blue Cotton 1770s Italian Gown

About this time I started watching Poldark.

Elizabeth from Poldark

Isn't it funny that thing that happens when you buy a new car. Suddenly it seems like every second car on the street is the same a yours. You start noticing them at every set of traffic lights!

This is what happened to me. Once I started historical sewing for real, I started taking notice of it all around me. Poldark, for example. In the first season, I watched it for the story and the scenery. In the second season, I watched it for the costumes.

Online again I went, this time to find a closed-front gown. These seem to be something that came more into fashion (at least amongst the gentry) later in the 18th century - more like 1780s. This time I found a really nice pattern company called Fig Leaf. I love the illustration first on the pattern, and then the fact that the pattern was taken from an extensive study of an extant gown for the use of a museum also gave me confidence. I try my best to do as much research as my limited resources allow prior to purchasing patterns, as it always costs so much to have them sent here. Its terribly disappointing to find out once it arrives that it's not authentic in its sewing techniques or pattern.

As I had several other things going on in my life right at that moment, the pattern stayed unopened for quite some time. However, browsing through...a local but nationwide store that I shall not name...I saw the perfect fabric and had to purchase it. It was an upholstery-weight cotton, in a pale sky blue, with a cream and beige floral and bird pattern on it. I had heard that cotton wasn't used until after this time due to laws, but I'd also read that no-one actually obeyed these laws anyway, so cotton was my new best friend. I purchased 9.5 metres of it, and this sat in glorious righteousness in my sewing corner for a couple of months until I felt I could justify starting a new project.

Isn't it always the way? I gleefully got out the pattern, cut it out, started working out my mock-up pieces to cut out on my calico...and found that I had 2 of one pattern sheet, and none of another. It happened to be the one with about 6 pieces on it! Grind to a halt.

I frantically emailed the company, and they were very quick to reply and print off the correct page and send it to me. Phew! It had cost me $51 plus shipping to get it here so I was a bit concerned! Restart.

I am disappointed to say, I didn't take any during photos. I don't know why, but I guess we all do it. I'm terrible and have to have the background uncluttered and neat, with no kids schoolbags and unwashed dishes to be seen, so photographing isn't always straightforward!

I am pretty proud of my pattern matching. 

Pinked sleeve trim: used no fray check...

Pinked neck trim: used fray check. Lesson learned!

Centre back pleats. Boned and stab stitched. Love that back.

Inside centre back. Pattern designer suggested alternate finish
but I like the tidiness of how I whipped the lining down afterwards.

Hook and eye closure. No, not brass, but nearly correct.

Back neck. And sleeve seams are not finished, which is correct.

There is a LOT of fabric in the petticoat: 4.5m from memory.
Very heavy!

I've reviewed the pattern, and for the most part it was excellent. I think the first pattern I used helped me understand the process, and next time I use the pattern, I will use some of the more accurate techniques that are described throughout the pattern as an option.

The fabric was very heavy, though the pattern author assures me that it is more accurate to use this weight. Elsewhere I have read that the silks became more and more refined, so that by this stage (1780) they were the feather-weight silk that we see mostly today. I think a good compromise would be an upholstery-weight silk, and I have my eye on some for the next time I sew this particular gown.

For this, the 'practice' round, I sewed the long, main seams with machine. This was the dress that wore my fingers completely out, and I finally had to learn to use the thimble. I read that thimbles are a main item in a seamstress's kit, and I now well-believe it. It's not fun when the thread end of the needle pierces your finger repeatedly!!

Final fitting

Here is a very poor photo of the dress. I will take the next available opportunity to get all the sewing details pictured and uploaded, as it's such a special garment to me. And I love the 'polonaise' style of skirt, though I believe it's not just the skirt-style that makes an authentic polonaise, but the sort of inverted centre front opening which is wider at the waist and meets at the chest. Pointless information, but I'm sure will be useful at some point!

nb I now know this is an Italian gown, worn retroussee (puffed).

Just for interest's sake:

  • Pattern $60.00 including shipping 
  • 5m cotton for gown (I actually only used 3.5m @ 150cm wide) $105
  • 4.5m cotton for petticoat (I actually only used 3.6m, for an ultra-full petticoat!) $94.50
  • 1m lining $27.00
  • Fitting muslin $3.00
  • Cotton thread $5.00
  • Plastic boning $2.00
  • Hooks and Eyes $3.00
Total $300.00 (I'd rather not have known this)

A Curtain Carico Jacket

What girl can resist ordering that extra item when you buy online? I mean, you've already got to pay shipping for one item, why not just throw in that other that you just loved the look of?

I was guilty of this when I purchased my first pattern. Twice over, actually, as I believe I bought three patterns at the same time. The first two I have already shared with you: the stays and the Robe a l'Anglaise. The third pattern I purchased was J.P. Ryan's A Fine Collection of 18th Century Jackets for undress wear. It sounded so special with a name like that that I had to have it!

I made View B, which was described: "has a long, full skirt, open front, stomacher and cuffed sleeves, as worn in the 1760s." I will review it on my Pattern Review page.


The fitting muslin I made up didn't seem to need many adjustments besides the usual lengthening of the front/side/back by 3.5cm. In the end, the fit of the final jacket isn't quite right anyway - almost too snug under arms - and so perhaps I needed to make further adjustments, however perhaps the lack of fit is in fact just how an 18th century garment fits. I have read that a woman's posture at this time was to have shoulder blades virtually touching and that is certainly not how we normally stand these days. Also, sleeves fitted snugly under your arms anyway in the 18th century. These days we have plenty of room for moving as we do, well, move. The fit perhaps of a woman's clothing destined for life on a farm or laundry room might have a slightly different cut. In fact, from what I read, many women involved in these active and energetic chores would just strip off their gown and do the work in stays and petticoat. Sounds sensible to me!

I had recently made curtains for my living room, a lovely creamy linen in a bright burgundy and green floral pattern. I decided to use this for the main fabric of the jacket, and line it with the left-over pink linen from my English gown. The inside of the burgundy flower on the main fabric is just the same shade of pink as the linen, so my artistic side was quite pleased with the result. I planned to pair it up with the pink linen petticoat that I had made for the English gown, and there's nothing that my eye enjoys more than looking at colours that match! As there were limited off-cuts of the floral linen, I decided to cut the jacket to the shorter basque cutting line, possibly more suitable to the 1770s. However the cuffs certainly date it to the 1750-60s so I will stick that that as my main era.


I sewed the pattern up on the machine - as I have mentioned before, when trying a new pattern out I don't intend to waste valuable time and blood on it! The pattern seemed to use mainly modern techniques: the self and lining (including the sleeves) sewn up separately and then the sewn together right sides together and turn right-side out. The wrist seam allowances were turned inside and cuffs were sewn into the sleeve ends.

Cute little cuffs

Inside lacing strip

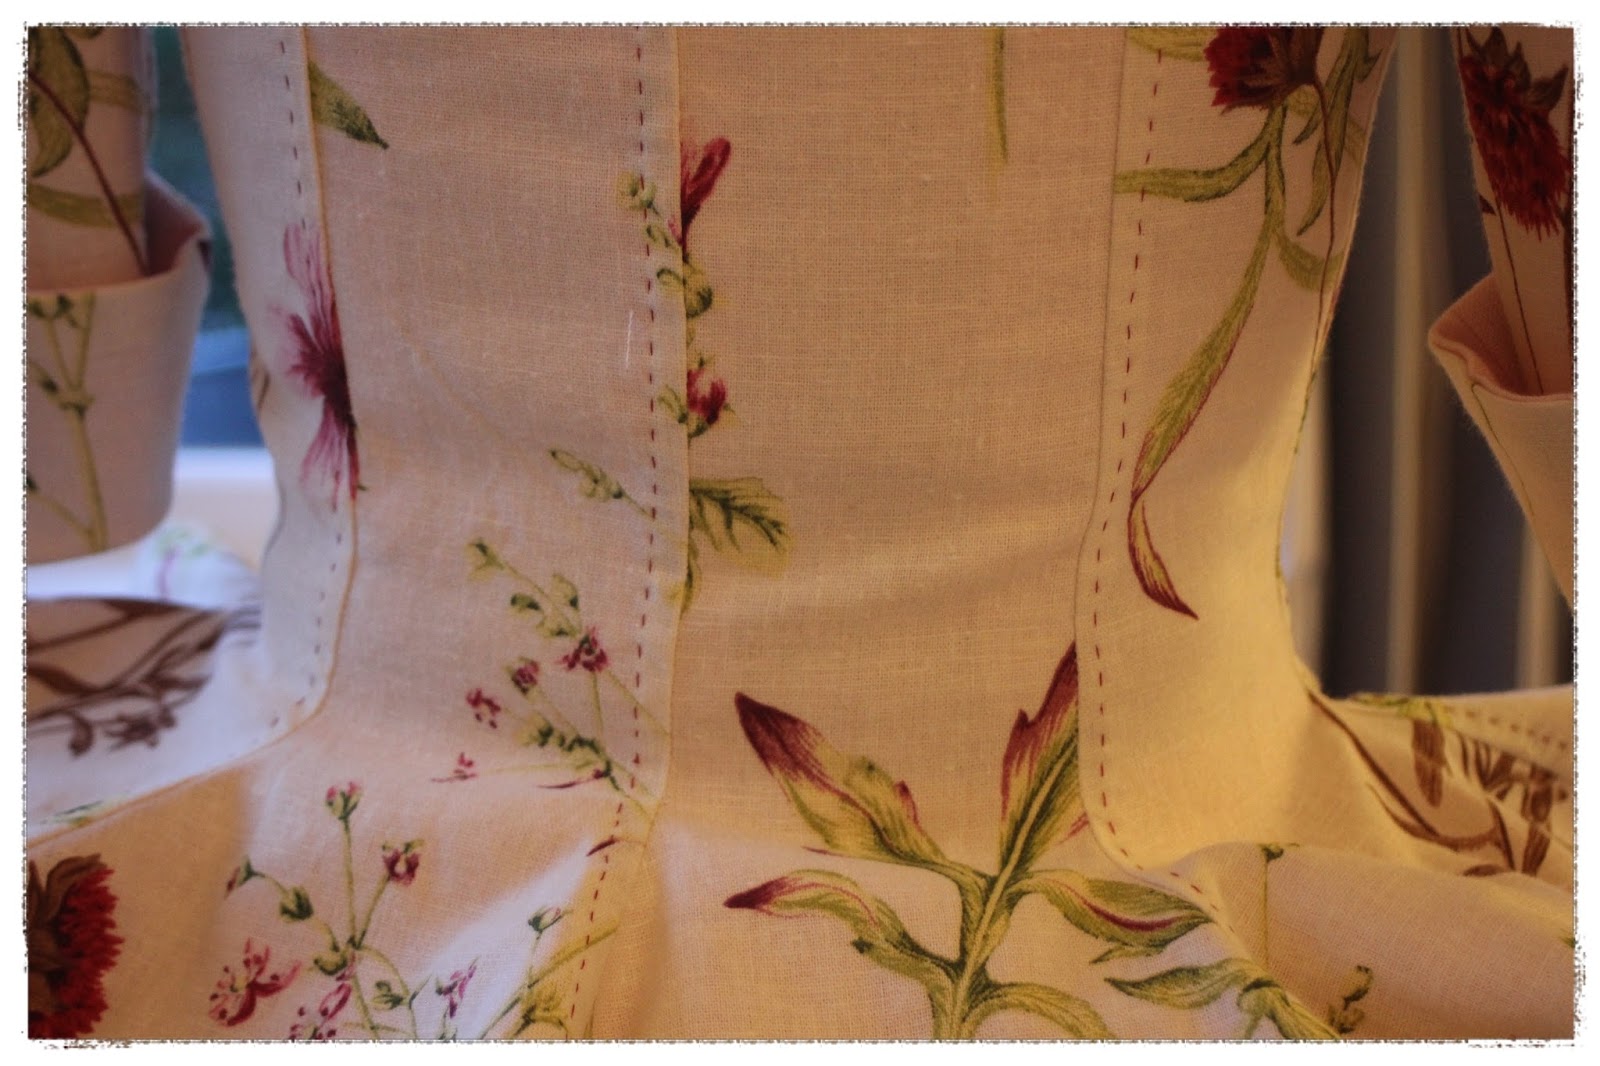
I top-stitched all the vertical seams with a dark burgundy to match the flower on the linen pattern, then purchased some self-cover buttons for the front. The pattern called for the cord to lace up around the buttons, however I must have got the wrong buttons or something as there was no way that the lacing was going to stay put. Instead, I sewed up two 3 cm strips of linen, boned both sides of the strip and inserted grommets down between them. As this was a 'practice', I hold with the same theory with hand-sewn eyelets as extensive hand sewing! This lacing strip I sewed into the front edges of the jacket and the lacing is inserted between jacket and lacing strips. The buttons are now just for show of course, but it looks smarter.


For the stomacher, the pattern designed it to be sewn up using two pieces of interlining, with boning channels sewn into them. The lining and self are then sewn to it and it's flipped right side out. Bones are inserted and it is hand-sewn shut. This leaves it nice and tidy with no visible boning channels.

Partly boned stomacher

The jacket is nice and smart, with a snug fit, and it looks fabulous with a fichu ticket in. It's not the most comfortable to wear, but possibly that was the fault of my 21st century sense of comfort! It looks very smart with the pink petticoat and a bumroll. I imagine it would suit a woman who is the wife of a store owner or captain of a ship, and she would wear it while out buying from the markets or visiting her sister in the morning.


Just for interests' sake:
Cost of Jacket
Pattern: $35
1m upholstery/curtain linen: $0
1m medium weight pink linen: $0
Poly thread: $0
Self-cover buttons x10: $7
Boning x4: $.75

TOTAL: NZD$42.75