Showing posts with label 1760. Show all posts

Saturday, 10 June 2017

Silk 18th Century Petticoat in Blush

My holiday morning coffee
This is how I like to holiday. It's camping...of a sort.

Queen sized bed on it's own folding base, side table, duvet and pillows. Gosh, even my favourite linen bolster pillow! Coffee, a good lantern and some books. You can't see the shag-pile rug or the gold LED light hanging above the bed.

I admit, we do take rather a lot camping. It's my husband's fault. He insists we take our horse float. It means that nothing needs to be tied down or water-proofed. You just chuck it in and shut the ramp. I've built a shelf that fits at the mid-height, leaving us twice as much storage area. Bikes and surfboards under, suitcases and bedding on top. The rug went in to protect a surfboard, and the rest...well, there was room...so why not?

Well, camping is all fun and games for the kids, but sometimes it gets a little boring for me. I had brought along with me a couple of big hard-backs of garments from the Met. Museum - just your average holiday reading. I was reading up on 18th century clothing and underwear. But the natural outcome was the desire to start creating. So I went in search of a fabric store.

In fact, there was a fabric store and I was able to purchase a couple of fabrics, a sprigged cotton which I intended to use on a Regency dress at some time, and a blush silk. Sure, it was only dupioni silk, but for all that purists say it's sub-standard and barely fit for lining, I like it. I love it's slubbiness and it's lustre. I'll say it's an under-petticoat, and just enjoy the fact I'm wearing a silk petticoat, should that ever actually happen. Highly unlikely. For now, it's an 18th century silk petticoat that just sits in my cupboard and looks pretty. :-)

First, stitch up side selvage seams, then stitch (running) 10" pocket openings.

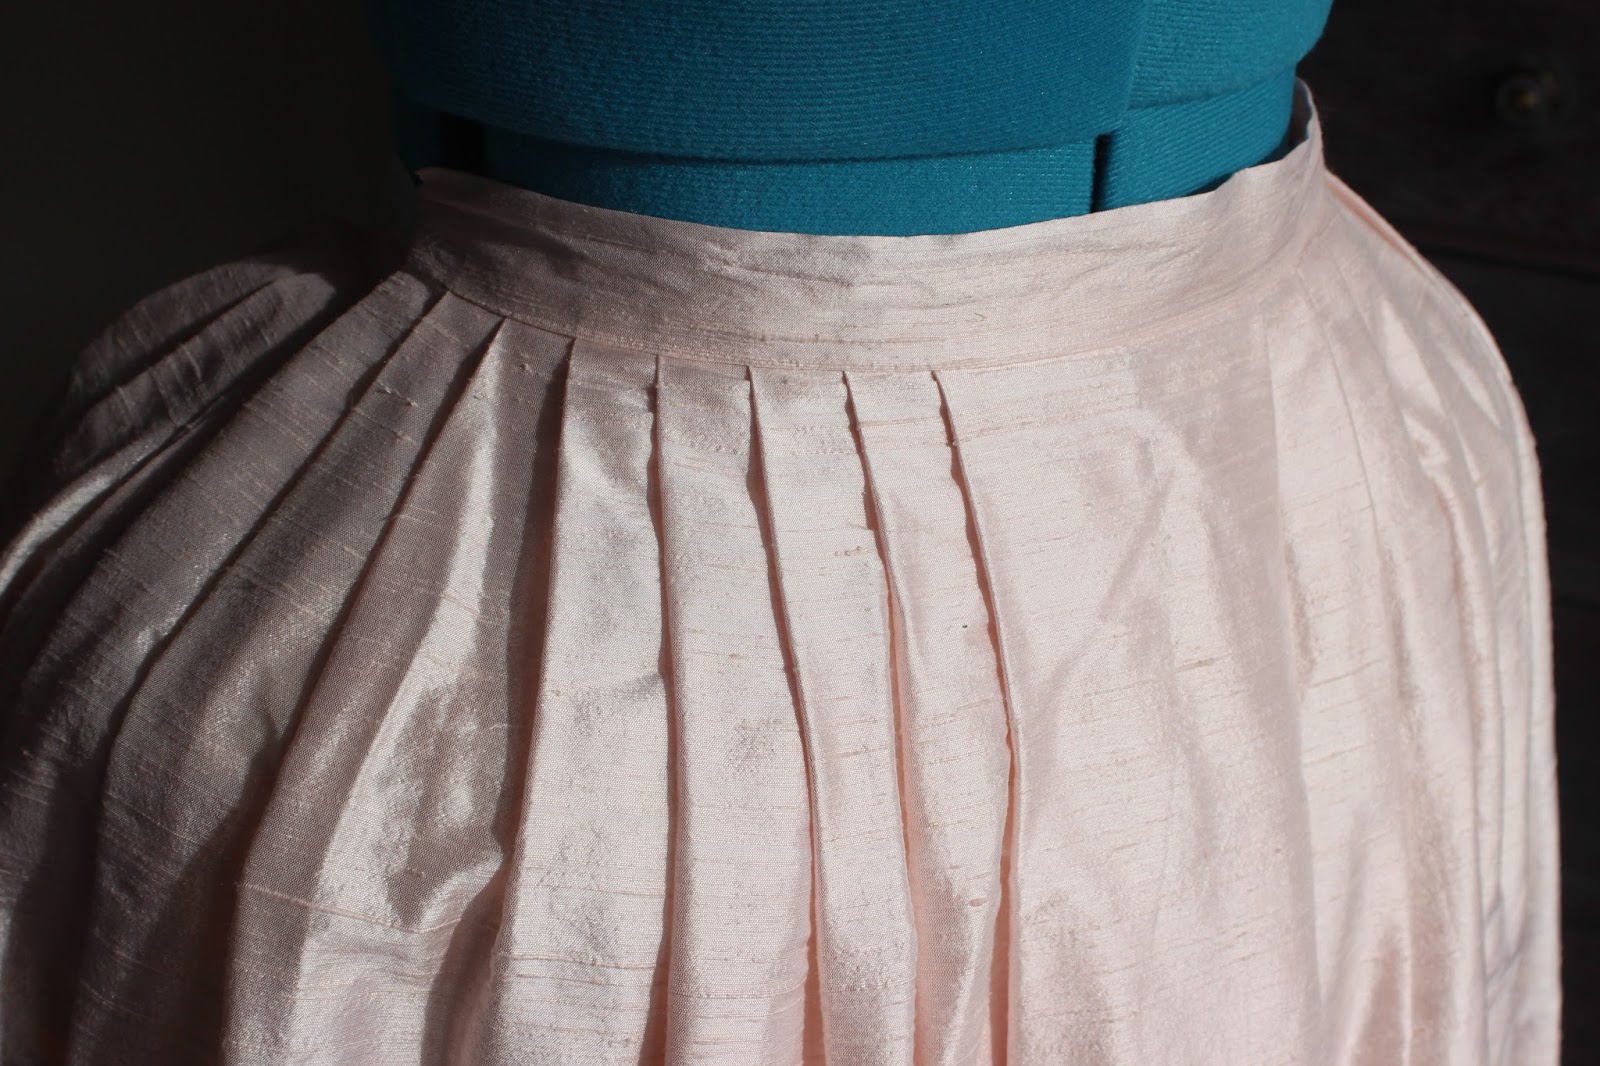
Pin up 1" knife pleats with large box pleat at centre front
and inverted box at centre back.

Cut waistband from self-fabric and pleat to match width, leaving SA at edge

Sew waistband to pleats using backstitch

Outside of waistband before whipped to inside


Finished waistband on petticoat

Bottom hemmed, tucks added by hand, and lace edging

Yep, the lace is probably terrible. I'll have to have a look further into that: lace is certainly something we 21st century women know nothing about! My daughter (16) doesn't even know what it is. For now, it's staying. When it has an actual costume to compliment, I will find out what kind of lace is appropriate and I think it will require a whole post. 

Thursday, 8 June 2017

Grey Linen Full-Boned Stays

There is one fundamental problem with period correct back-lacing stays: Ones inability to get in or out of them. Have any of you felt that panic well up inside you when you realise you are STUCK? (I'm brought to mind of an experience of my brother who had to get a friend to cut him out of a wetsuit once!) It's not a pleasant experience.

Monday, 5 June 2017

A Curtain Carico Jacket

What girl can resist ordering that extra item when you buy online? I mean, you've already got to pay shipping for one item, why not just throw in that other that you just loved the look of?

I was guilty of this when I purchased my first pattern. Twice over, actually, as I believe I bought three patterns at the same time. The first two I have already shared with you: the stays and the Robe a l'Anglaise. The third pattern I purchased was J.P. Ryan's A Fine Collection of 18th Century Jackets for undress wear. It sounded so special with a name like that that I had to have it!

I made View B, which was described: "has a long, full skirt, open front, stomacher and cuffed sleeves, as worn in the 1760s." I will review it on my Pattern Review page.


The fitting muslin I made up didn't seem to need many adjustments besides the usual lengthening of the front/side/back by 3.5cm. In the end, the fit of the final jacket isn't quite right anyway - almost too snug under arms - and so perhaps I needed to make further adjustments, however perhaps the lack of fit is in fact just how an 18th century garment fits. I have read that a woman's posture at this time was to have shoulder blades virtually touching and that is certainly not how we normally stand these days. Also, sleeves fitted snugly under your arms anyway in the 18th century. These days we have plenty of room for moving as we do, well, move. The fit perhaps of a woman's clothing destined for life on a farm or laundry room might have a slightly different cut. In fact, from what I read, many women involved in these active and energetic chores would just strip off their gown and do the work in stays and petticoat. Sounds sensible to me!

I had recently made curtains for my living room, a lovely creamy linen in a bright burgundy and green floral pattern. I decided to use this for the main fabric of the jacket, and line it with the left-over pink linen from my English gown. The inside of the burgundy flower on the main fabric is just the same shade of pink as the linen, so my artistic side was quite pleased with the result. I planned to pair it up with the pink linen petticoat that I had made for the English gown, and there's nothing that my eye enjoys more than looking at colours that match! As there were limited off-cuts of the floral linen, I decided to cut the jacket to the shorter basque cutting line, possibly more suitable to the 1770s. However the cuffs certainly date it to the 1750-60s so I will stick that that as my main era.


I sewed the pattern up on the machine - as I have mentioned before, when trying a new pattern out I don't intend to waste valuable time and blood on it! The pattern seemed to use mainly modern techniques: the self and lining (including the sleeves) sewn up separately and then the sewn together right sides together and turn right-side out. The wrist seam allowances were turned inside and cuffs were sewn into the sleeve ends.

Cute little cuffs

Inside lacing strip

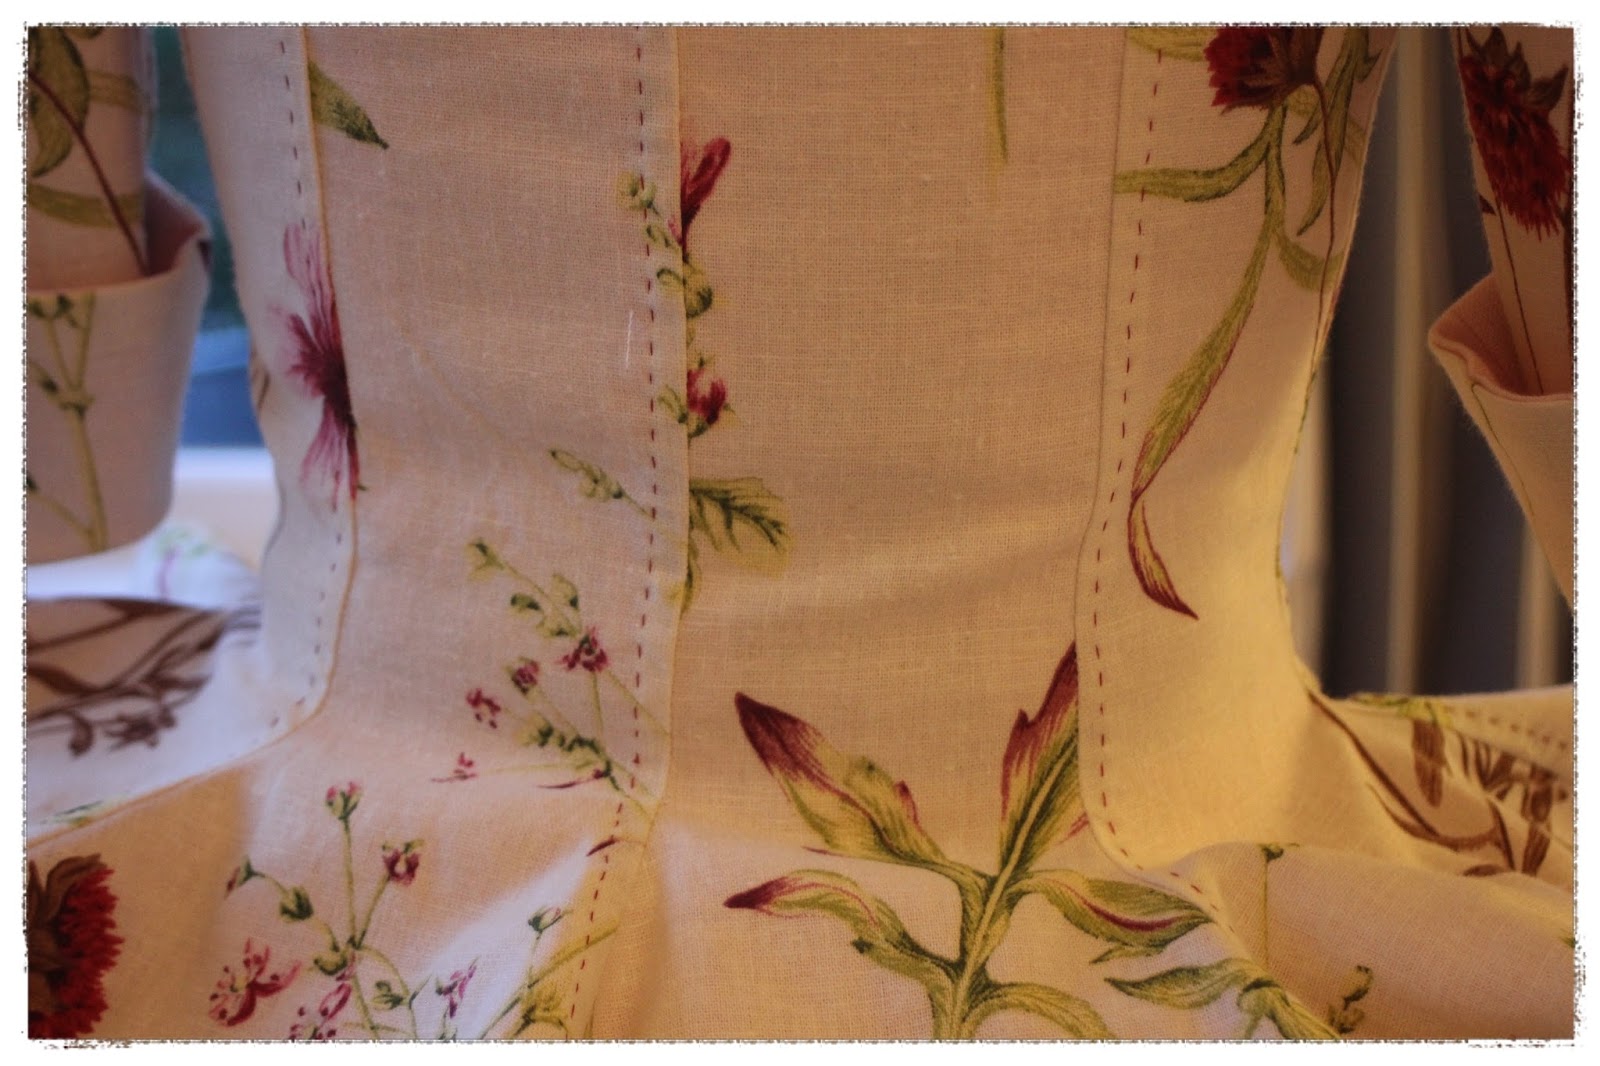
I top-stitched all the vertical seams with a dark burgundy to match the flower on the linen pattern, then purchased some self-cover buttons for the front. The pattern called for the cord to lace up around the buttons, however I must have got the wrong buttons or something as there was no way that the lacing was going to stay put. Instead, I sewed up two 3 cm strips of linen, boned both sides of the strip and inserted grommets down between them. As this was a 'practice', I hold with the same theory with hand-sewn eyelets as extensive hand sewing! This lacing strip I sewed into the front edges of the jacket and the lacing is inserted between jacket and lacing strips. The buttons are now just for show of course, but it looks smarter.


For the stomacher, the pattern designed it to be sewn up using two pieces of interlining, with boning channels sewn into them. The lining and self are then sewn to it and it's flipped right side out. Bones are inserted and it is hand-sewn shut. This leaves it nice and tidy with no visible boning channels.

Partly boned stomacher

The jacket is nice and smart, with a snug fit, and it looks fabulous with a fichu ticket in. It's not the most comfortable to wear, but possibly that was the fault of my 21st century sense of comfort! It looks very smart with the pink petticoat and a bumroll. I imagine it would suit a woman who is the wife of a store owner or captain of a ship, and she would wear it while out buying from the markets or visiting her sister in the morning.


Just for interests' sake:
Cost of Jacket
Pattern: $35
1m upholstery/curtain linen: $0
1m medium weight pink linen: $0
Poly thread: $0
Self-cover buttons x10: $7
Boning x4: $.75

TOTAL: NZD$42.75

Sunday, 30 April 2017

A Robe a l'Anglaise at last

Pink linen Robe a l'Anglaise

I would like to say, hand on heart, God bless Larkin and Smith.

Whoever you are and wherever you live in this world, may the sun shine on you and may you see your grandchildren's grandchildren.

I had decided to base the first dress pattern I made roughly mid-18th century. The gown pattern I landed on was the 18th Century English Gown, a 1760 - 1770s open front gown with a stomacher. I was a little scared of the French style of gown with it's saque back, and I loved the look of the back in the enfourreau style.

I first checked out how much fabric I would need. It seemed a huge amount at the time - about 7 metres from memory! I actually ended up with about 2 metres left over, while still doing all the recommended fullness, so I guess it was because it was a plain fabric and no need to match patterns?

The fabric I chose was a medium weight pink linen. It is the lovely dusky pink colour that I am extremely partial to right now. I'd no idea if women of my class (middling classed wife of a shop owner!) would wear pink or linen. I think that possibly no-one over the lower class actually wore linen outer-wear, and especially not in the open fronted robe style. Pink was probably less inaccurate than the fabric. But for now, linen seemed nice and authentic, and I wasn't that keen on forking out for 7 metres on a $50/m silk and upwards, on a whim. What if I made an absolute stuff up of it?!

I also bought coarse pink cotton thread as the local Big Box fabric store had no linen.

I started with the mock-up. As before, I took the size 34 and added 4cm to the length of the bodice front and back. There was two pages, and seven steps and relevant full-colour photos to help with this process. As I don't know exactly what they ought to fit like at this stage, in terms of creating the correct posture, it is still somewhat trial and error as I have never actually worn a true 18th century costume!

Cutting and pleating the back panels was easy and extremely rewarding. I had never actually hand-sewn before, and it was very interesting to read that historically there wasn't the stigma of having to hide the stitches from the outside. The stitching became something of a feature and a place to show off your abilities (or that of your seamstress anyway!). I loved the pleating template that they included, as it made it so easy to get the accurate width and curve to the pleats.

Inside waist seam

The pattern uses the technique of sewing the lining to finished pieces and then to each other, rather than completing the entire outside fabric and the entire lining and then sewing them together. This is new to me, but makes it possibly to ensure all the pieces are lined up and the correct size with no horrible realisation when inserting the lining that you have cut it in the wrong size!

Neck facing were something of a tricky step, and it seems common to have a slightly un-symmetrical back neck facing on many original gowns. This makes me feel better! I still tried my best to have corners matching but didn't quite make the mark in many places.

Back neck facing

The stomacher was a slight failure, as for some strange reason I omitted to lengthen it as I had the bodice pieces. The pattern also calls for it to be un-boned, which is all well and good when pinned to one's stays. However I was completely new to this and the idea of pinning oneself into ones clothing was terrifying!

Unboned, wrinkly stomacher in floral linen

In the end, I tried on the gown and marked the edges of the robings, and then sewed hooks and eyes to hold the stomacher inside the gown. This I will definitely change at a later date, but for now it felt a little less scary. I also sewed the robbing completely down the front opening. This is probably going to be a problem if I ever wear the dress, as it means the robbing need to be folded back open if pinning and then folded back over the pins. However I think some gowns had robings sewn to them, so maybe it's not entirely inaccurate!

Hooks and eyes for stomacher

To get the correct silhouette I needed a bumroll. Either that or panniers, but that seemed much more casual and easy. A couple of attempts later, below is the resulting silhouette. It was made of a banana-shaped tube of some left-over fabric, lots of poly-fill from some old cushions, and two pieces of cotton tape. Bob's your uncle.

Finally I made the petticoat in the same fabric, knife pleating to the suggested width of 1" each. I made a self band to tie front and back with the traditional pocket openings of 10" on each side. At this point I think I decided that I was just going to interchange imperial and metric measurements and this is what you get!

Below are the dummy photos. Unfortunately the dressmakers dummy is too large for the dress dimensions, so I will later post a photo shoot by my lovely daughter, wearing it myself.


Worn over my first unsuccessful shift attempt.


Just out of interest
Pattern plus shipping: NZ$60.00
Linen fabric: 7m @ $13/m$91.00
Linen lining: .5m @ $30/m$15.00
Cotton thread: $4.00
TOTAL: NZ$170.00

Friday, 28 April 2017

The First Set of Stays

It was time to take a deep breath and hold it for a very long time. Both while making the stays as well as while wearing them, I had no doubt.
Image from Pinterest
The pattern I used was JP Ryan's 18th century Strapless Backlacing Stays pattern (see my pattern review page). This was the first time I had read the term "Mock up", and it was an unknown to me. How much do you make up? How much detail do you go to? Isn't that insane - to almost completely make up something only to pull it apart again??

One helpful blogger told me that you basically make it all up in two layers so that you can put in maybe half of the boning, use an old eyelet strip to lace it up, and then repeat. Numerous times.

I think I only made one mockup, added 4cm to the length at the point at which it told me to lengthen/shorten as I have a long body, and cut it out using the size 8 and making no adjustments to the bust or waist. I tend to also have a narrower waist as well as bust to the norm so I should have learned to make mock-ups and adjust patterns years ago. However stays are so personal to the individual that all that correct fitting is heightened.

I decided to machine sew the stays as much as possible, as the fabrics weren't strictly accurate and I was also not quite sure they would work out! There is no way I wanted to waste 40 hours of my life for something I was going to throw out.

After the mock-up, I cut out the pattern using a thick cotton left over from some blinds I'd made, cotton duck left over from slip covers I'd made, and the aforementioned 'unneeded' cotton sheet. I stitched together the self and interlining fabrics, then sewed them together as one, as with the lining. Once pressed, they looked quite smart and well-behaved.


Now it was time to begin sewing the boning channels. These are sewn through the two layers of self and interfacing, including the seam allowances. I was intending to use zip-ties/cable-ties for the boning, so I used one as a guide to mark the width of one or two channels in pencil. I took note of where the machine foot was placed when sewing these and from then on was able to sew the boning without marking, simply using the machine foot as a marker. This works easily with fully boned stays as the boning is all parallel to one side seam, and you just stop when you run out of room for a full boning channel, and begin on the next panel.

When I got to the back centre edges, I folded the seam allowance at the marked place, so that the boning continued over the seam allowances nice and neatly, leaving room for two bones in the last channel. The pattern called for metal bones at the seam edge of each panel, however I didn't have access to these so I made each one slightly wider and inserted two zip-ties instead.

Yes, this does reduce the size of the stays, but hopefully the mock-up has taken this into account and the stays are slightly too large! Also, by making sure there is plenty of ease at the lacing edge, the stays can be loosened if too tight and then tightened again once they stretch and give with wear.


And now it was time to insert the boning. This was lots of fun, made quite a mess, and worked very well with the zip-ties. I extended them into all the tabs as the pattern stated, stopping where they would extend into the seam allowance.
Now it was time to get onto the binding. I have heard horror stories about binding stays, especially the tabs. I found a good website on Yourwardrobeunlocked that gave some great ideas, some far more advanced than I was going to attempt, but very useful.

However, I didn't find this until I had finished the tabs! For some reason I thought that it would be easier to use wider binding, so bought ready-made binding in the wider size. I feel better knowing that that was part of the reason it was so difficult, but to be quite honest it wasn't too torturous.

In my naivety I didn't realise that I could sew the outside of the binding on by machine, saving myself a lot of trouble. I pinned the binding around the stays, then slipstitched them on by hand. Not neat, not smart, but serviceable. Actually, probably not serviceable either by hey, I wasn't planning on wearing them every day or anything!


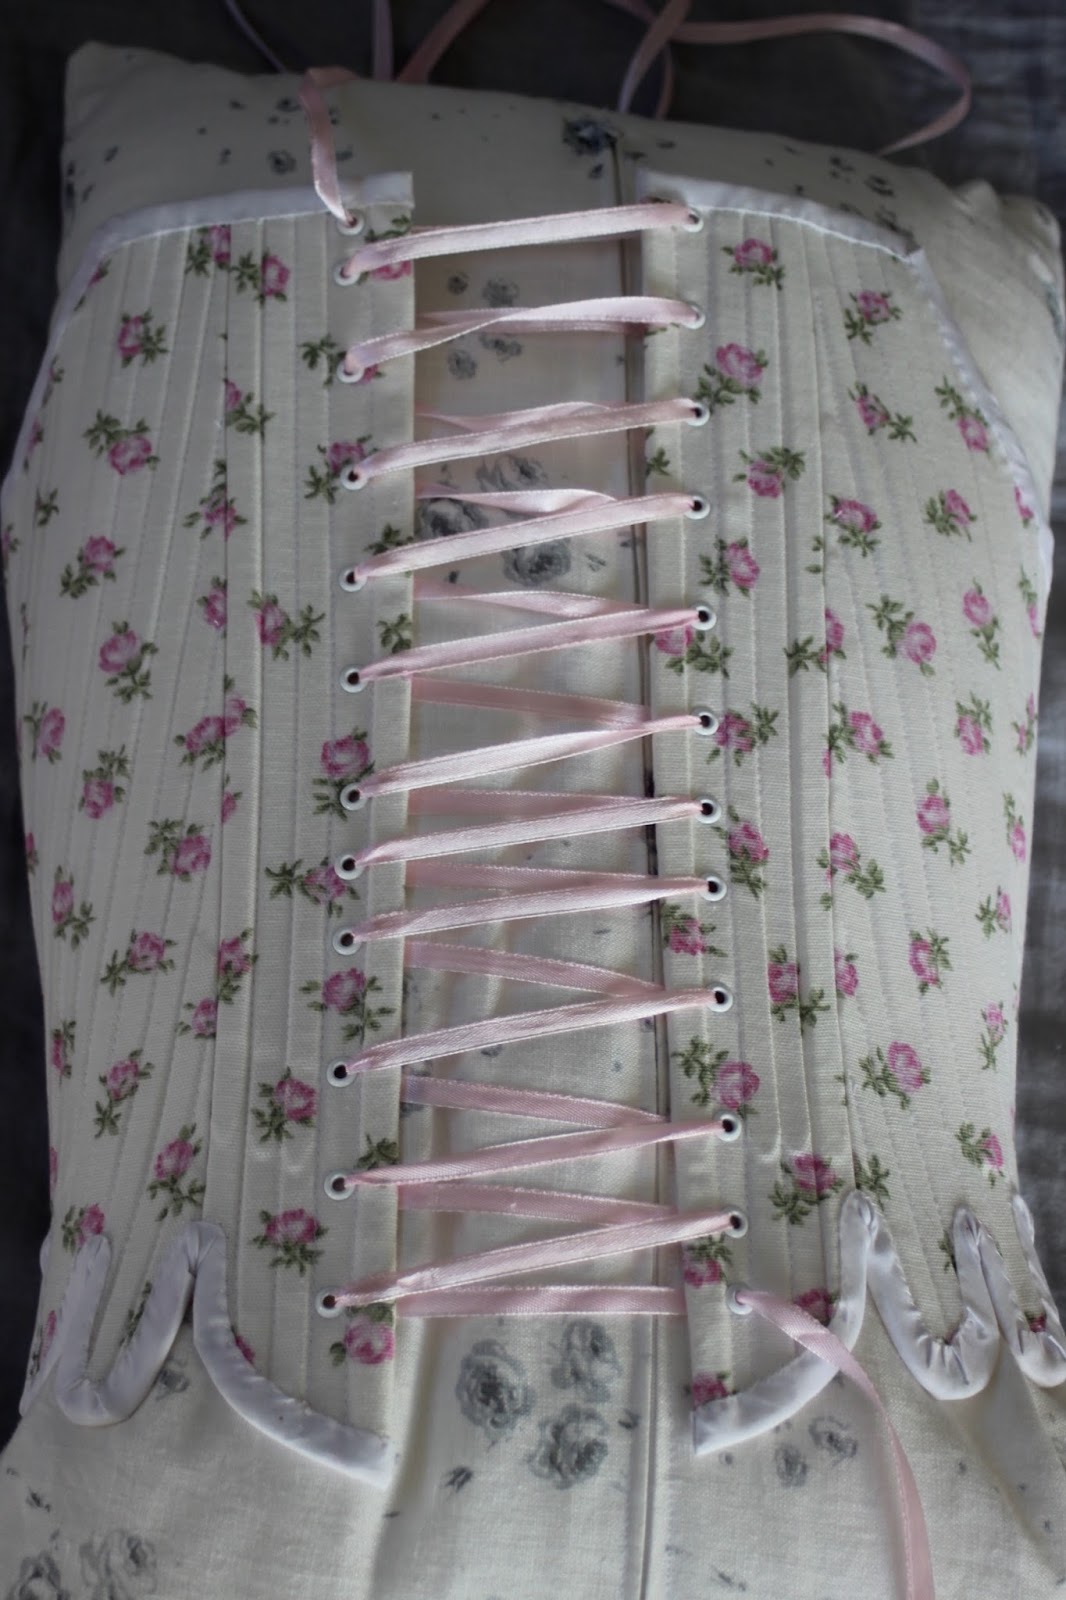
The final stage was the eyelets. With the same mentality as that I had with the sewing, I decided to use metal eyelets instead of working by hand. I found them in white at the local fabric store, as well as a little tool to insert them. The tool is terrible and leaves the edges all ragged. It ruins the ribbon I laced it with, so I decided to either a)become more authentic and make them by hand next time or b)not be so cheap and go out and spend $50 on a better tool.

I inserted the eyelets in the recommended spiral style, not entirely evenly! Oh well, I tell myself it's my practice set of stays. 

Finally the stays were finished! 

I thought I had been clever by buying a mannequin before starting on this project. Wouldn't it just make all the work easier! I could simply make the dummy my own dimensions and pin to my heart's content. Of course, the dimensions are all well and good, but they don't actually go small enough for me in the waist and bust, and as we all know (now), corsets and stays are to create a specific shape that a solid dressmakers dummy won't conform to! So a bolster pillow did for the photos. I promise I will get some of it on myself once I get around to it.


Just for interest's sake:
Fabric: Left-over cotton curtaining 50cm: $0
Left-over cotton duck interlining 50cm: $0
Cotton sheet 50cm: $0
Eyelets x24 $5
Poly thread: $0
Bias binding: $3
Poly ribbon 2m: $2
Zip-ties 40cm x100 (not sure how many I used): $20
TOTAL: NZ$30